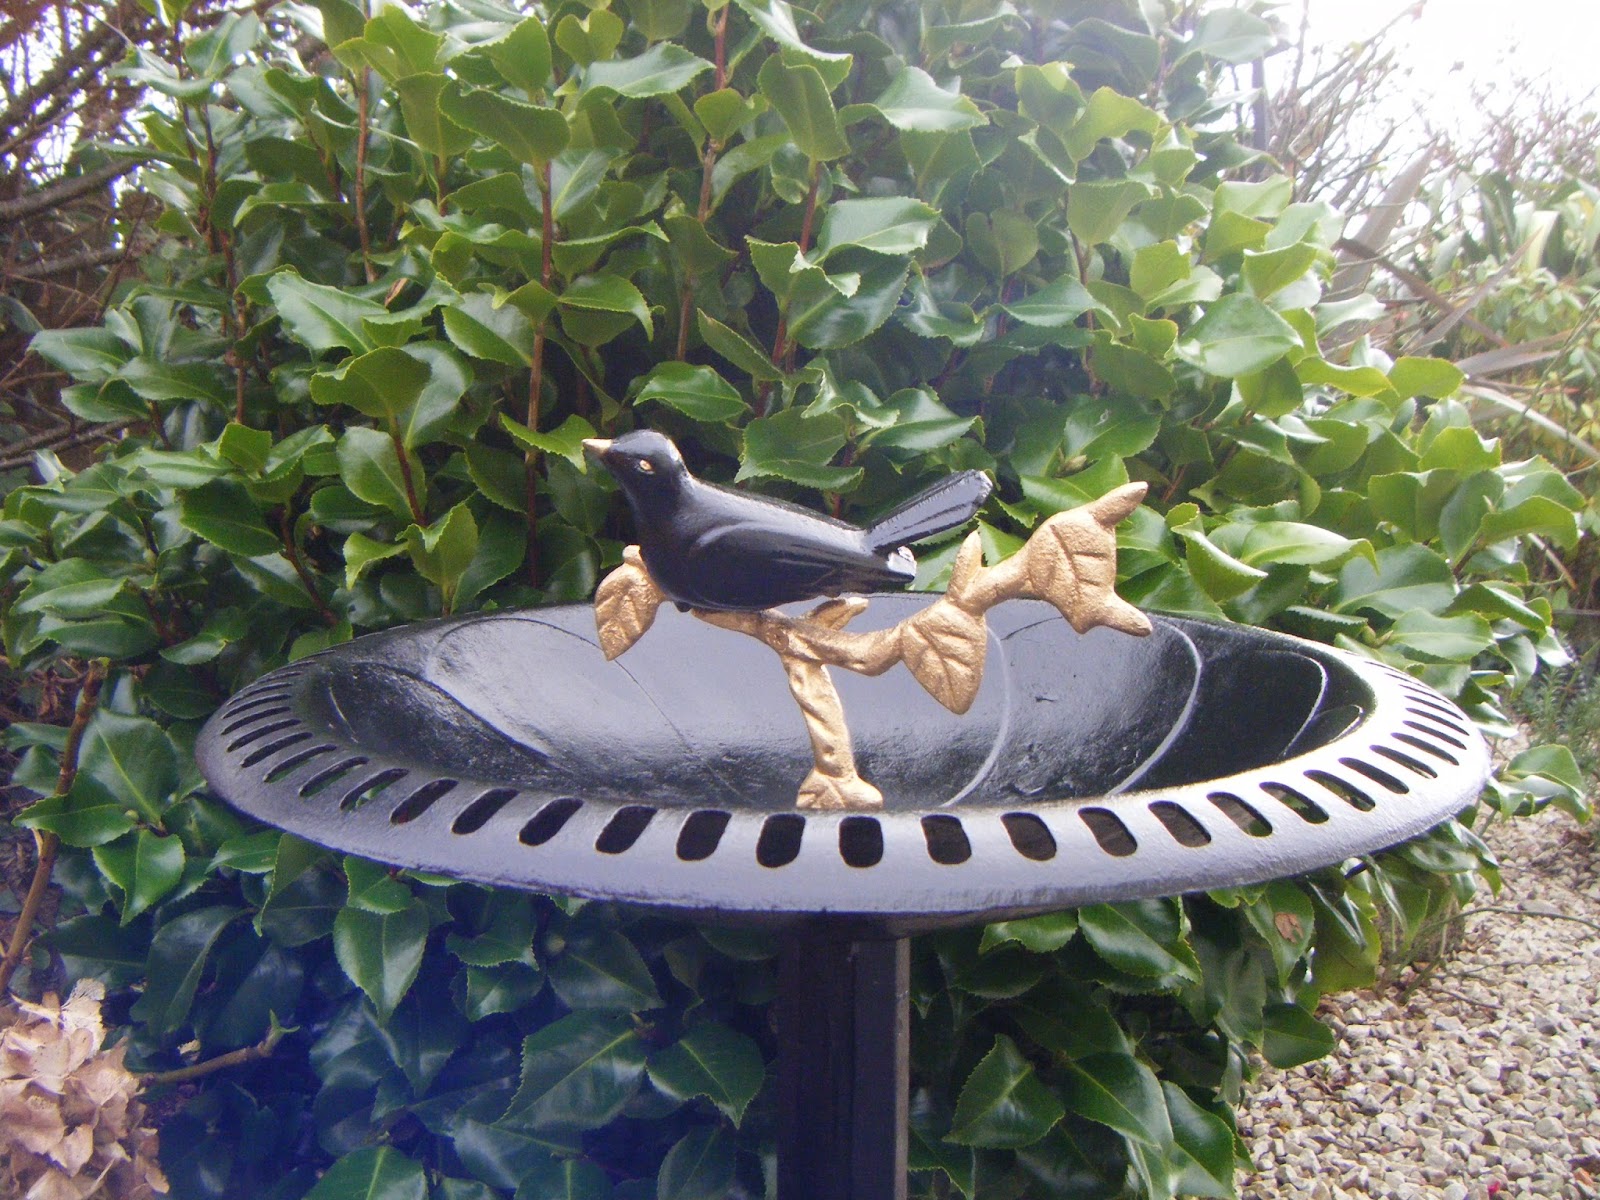
Wednesday, 21 December 2016


Beautiful bird bath


I bought this piece months ago off my buddy Stanley. The peeling paint and rust came free but I kind of thought I have loads of time between now and Christmas to strip and re-do. Me being me I started it on Sunday 18th Dec.......last minute .com as usual


First job involved a lot of scraping and a good deal of a wire brush. On number one sons advice I decided to treat with a rust stabiliser 


This one from hammerite is a really easy process, just paint it on. It turns a blue/Black and can be painted after 3 hours.


I really would have loved to have kept this finish but it wouldn't last in the garden


First coat was an undercoat, followed by 2 coats high gloss metal paint, branch and beak in gold. 
This piece has a bit of weight to it and so will be perfectly suited to its final destination. Donegal coastal gardens.......Everything can and does take off in the wind


Definitely not wrapping this Christmas present but can't wait to give.

Tuesday, 13 December 2016

A simple paint job

A simple paint job


sanding this piece was time consuming to say the least. I removed the hardware and the glass from the doors, undercoated the entire thing and finished off with two coats of eggshell paint.

VOILA


Friday, 4 November 2016


BED AND BEYOND


I have spent weeks looking at this poor single bed. I have moved it around my workshop and almost disposed of it several times. The urge to saw it up won out, resulting in a bench.
First I lowered the headboard by sawing the bottom 10" off the Legs. I dismantled the footboard and done the same to the front legs. I gave the side rails the same treatment reducing them to 24".


The footboard I decided to re-attach upside down after sawing off 6" to create a straight edge to become the front of my bench


The original lip on the side rails allowed me to reuse the bed slats to create the seat of the bench.


Starting to resemble a bench


     I used a 2" foam to create a seat pad, covering it with tartan.


I decided to upholster the top panel of the back of the bench, I used a piece of 1/2" foam to pad and covered in the same tartan, added a little piping cord to finish it off


                                  Little bed became a really sturdy bench


Saturday, 24 September 2016


LAMP REVAMP


I rescued this poor lamp from a second hand shop. Solid wood base looked a little tired and the shade or what was left of it was completely banged up.


I have been hoarding an old sample book of paper backed silk. 


Perfect for revamping the lamp base, just the silk and good old PVA glue.


The pleated paper shade cover was the next item to get covered in silk.


Time consuming to cut all the strips to size and glue over the pink stripes on the shade...  


A little bobble trim attached with the glue gun as a finishing touch.


          Voila !

         LAMP
       REVAMP

Thursday, 25 August 2016

locker recycle/up cycle


 LOCKER GETS A LITTLE TLC

#RECYCLE/UP-CYCLE


I totally dismantled this locker. I removed the top and the base. I then cut the sides and back just below the drawer.


dropping the drawer down onto the base reducing the height.


I added 4 castors to the base.


Next step was to remove the drawer front and upholster in this fab wool tartan.


put back on the top, used a little tech 7 instead of wood glue. (currently obsessed with this product)


the original locker had a nifty little pull out panel that I didn't even know existed until I dismantled the piece as it was totally swelled and stuck. a quick plane on the sides and it ran freely.


I added a 2" topper as a finishing touch to what is now a footstool.


A great little extra seat or footstool with a handy pull out table. a little extra storage with the drawer, an added bonus.

Monday, 23 May 2016


Chair revamp fit for a princess
or two.


A 1970's chair and a discontinued fabric      sample book.


Remove the seat pad and unpick the staples to remove the original upholstery fabric


A padded loose cover to fit over the back of the chair.
A second loose cover made from chosen pages from the sample book


The cover should fit snugly 
over the back of the chair.
 I left the long flap to allow 
me to staple the fabric
 to the base of the chair.


staple a skirt to the base of the chair. I created a pleat at the 4 corners, re upholstered the seat pad and screwed it back on


This chair was for princess Jessie's room so I personalised it with a reverse applique cushion on pink velvet


 Two princess's in the one house meant that this was one of a pair. I went for  reds and golds to create Emma's chair


 Best part of this project was the
 reaction of my two beautiful nieces


Wednesday, 4 May 2016

Wardrobe Revamp


 Wardrobe revamp


I reckon that I wear about 10% of my clothes 90% of the time.
The rest is a mix of things that I wish still fitted and impulse buys that
warrant arrest by the fashion police!

This little beauty takes up a hanger in my wardrobe because........?
 I like it from the waist up. 


Well I have decided that it deserves to see the light of day.
Dress code at work is black and white and another top never goes amiss.

Simply measure the length you want your top to be and cut off excess.
Don't forget to cut a little longer to allow for hem.


A little double turned hem and a quick iron,
Hey presto project complete.


Monday, 25 April 2016


In the bag!


this was a charity shop find, bought only for the fabric. Originally I thought it would become a skirt, but a bag it is.


Firstly I filled in the
 neckline with leatherette


shortened the skirt to
desired length


added a leather base


Use a strip off the bottom
of the skirt to create
a strap to lengthen the shoulder strap


As you can see the original lining of the
dress becomes the bag lining.
I added a zip fastener .


lastly I cut these figure 8
petals to create a flower corsage
and added it to the bag


Our little tote in use